With the free image editing programme GIMP, shop operators without Adobe Photoshop also have a helpful tool at their disposal for editing product images. Cropping product images with GIMP is easy and with our operating instructions for the graphics programme you will quickly achieve your desired result: a cropped product image that cannot be distinguished in quality from that of a professional graphic designer.
Content: Cropping a product image with GIMP
- Draw a section around a product image with the path tool
- Subsequent path editing for a more accurate result
- Select a path, copy it and save it in a new layer
Unfortunately, it is still not the rule to receive cropped product images from suppliers and manufacturers and many shop operators save the expensive investment in a Photoshop workstation, especially in the start-up phase of the shop system. Sooner or later you are faced with the task of having to crop product images without being able to resort to Photoshop. When looking for alternative graphics programmes for cropping product images, one quickly hears about the free graphics editing software GIMP. GIMP is wonderfully suitable for cropping product images.
First we need to open a product image for our online shop in GIMP. To do this, press the key combination CTRL + O under Windows. Select an image that contains an object you want to crop and open it.
The image is now displayed in the workspace. To be able to work more precisely, we press the Z key once on the keyboard to select the zoom tool. With the left mouse button pressed, we can now select a section of the image and when we release the mouse button, the selected area is zoomed to the size of your working area.
Using the path tool to draw a section around a product image
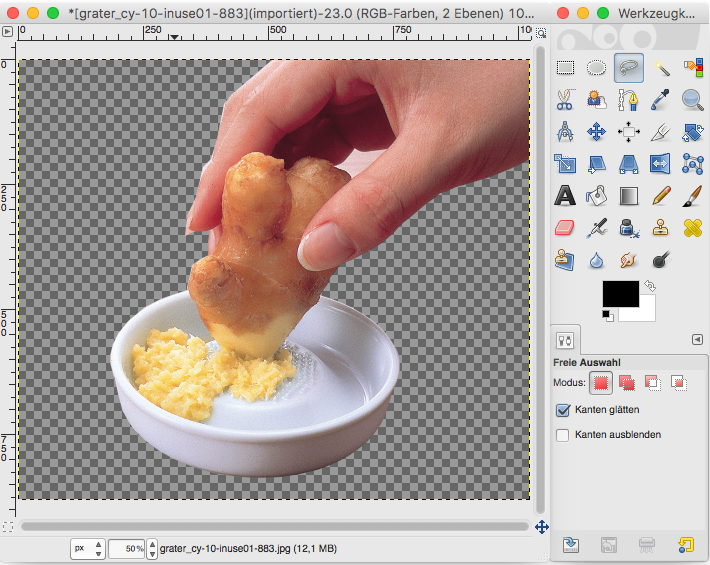
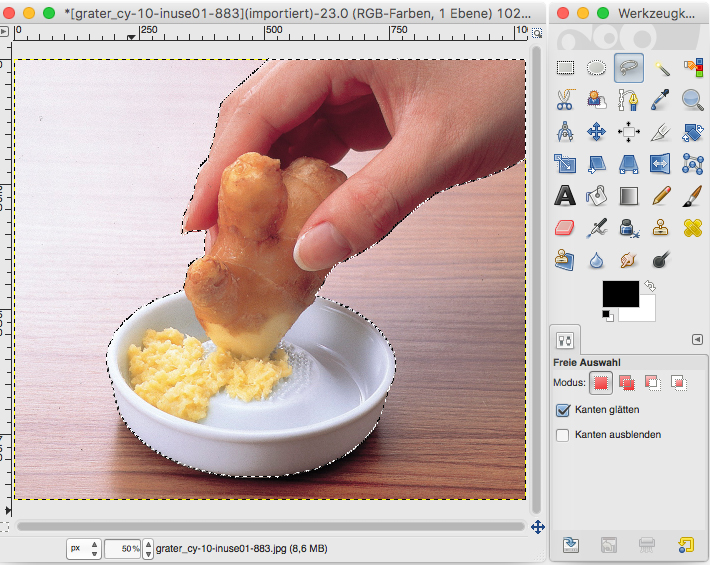
Then we select the lasso tool in the toolbar at the top left and start at the edge of your object to be cropped with a left click to draw a frame around the object that is as exact as possible. Each additional left click creates another anchor point from which you can continue working. Draw the frame around the entire object and finish your input by clicking on the first set point. The path is now closed and you automatically receive a selection that corresponds to your object outline. This selection is represented by a small moving line.
Subsequent path editing for more precise cropping
In order to smooth the still somewhat hard edges and thus obtain a visually better result, we click once on Selection in the menu bar and then on Hide. In the opening context menu we can directly confirm the preset value of 5 pixels. Our path now has considerably more selection points than before and the selection appears more rounded.
Selecting a path, copying it and saving it in a new layer
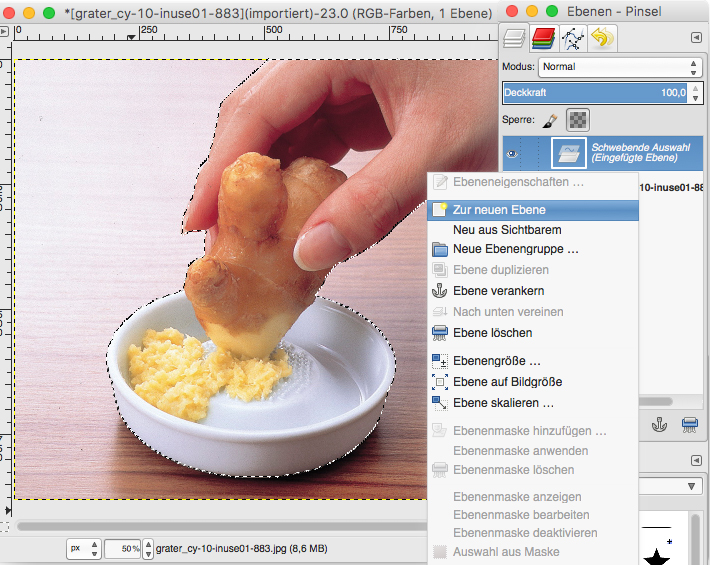
Now press CTRL + C on the keyboard and directly afterwards CTRL + V and your cropped object is now in a floating selection. Click with the right mouse button on the floating selection (layer window top right) and then on to the new layer. The floating selection is now a new layer with your cropped object.
Now select the old layer in the layer window and hide it by clicking on the eye symbol. You will only see the cropped object and can now save it. Select the PNG format to preserve the transparency.